January 29, 2008

"Al Gore is a slacker and I made apricot pie"


My internet was goofy all day yesterday and finally went totally down today. "They" said it was a tower down because of the storm.


I blame Al Gore. I mean, if he invented the darn thing, you'd think he'd keep it going!
But oh no, he's too busy going all over the place trying to make everything better for our planet. Hey Al, first things first, ok pal??? You can't make the environment better if we can't email all our friends to stop buying Dixie cups!!!


I could read email on my Blackberry, but I cannot, for the life of me, type on those itty bitty keys very fast, so I couldn't communicate. I'm back up, which is great, because I'm kinda addicted to cyberspace. I mean, what is the purpose of life, if you can't forward jokes???


For this week’s “Papa Dale Pie Project”, I’ve made an apricot pie. Now, I was stumped on how the heck I was going to make an apricot pie, with no fresh apricots – even though my Dad said canned ones would “be fine”. It didn’t sound likely, in fact it sounded kinda horrid. So I decided to call on the experts….the wonderful Norita Solt, who has won something like 2 zillion ribbons in the Iowa state fair over the years. She had some very good ideas and also very generously contacted Louise Piper, another very proficient prize-winning pie baker, who had a simple recipe using canned apricots. Bakers - the most amazingly generous chemists in the world. Thank you, ladies – you’ll made the world’s foremost pie expert (my Dad) very happy!

I'll take it to him tomorrow morning...I know it will be wonderful.

Louise Piper’s Apricot Pie

Pastry for a 9” two-crust pie
½ cup granulated sugar
3 tablespoons cornstarch
¼ teaspoon salt
3 – 15 oz. cans apricot halves, well drained and cut up a bit
1 tablespoon lemon juice
2 tablespoons butter

Line a pie plate with bottom crust.

Combine the sugar, cornstarch and salt in a large bowl. Fold in cut, drained apricots and lemon juice.

Pour into pie shell. Dot apricots with pieces of butter. Cover top with pastry (either lattice style or cut vents in top) and crimp edges. Bake at 375 for 40 – 45 minutes or until nicely browned.

Cook’s Notes: I did add a scant teaspoon of freshly grated nutmeg to the sugar mixture. After I drained the apricots, I used kitchen shears to cut the apricots a bit smaller. I also patted them dry as possible with paper towels, so as not to be too mushy. I brushed the top crust with a little milk mixed with a dash of vanilla, then sprinkled granulated sugar over the top. I also needed to cover the crust edges with strips of foil (I use the “quick release” foil so it won’t stick!) to avoid over browning. Those store-bought tin pie edge covers never work for me. I like to cut 4 or 5 foil strips, about 4 inches in length and 2 inches wide, and make my own. Way better.


January 28, 2008

"Focaccia"


When I am feeling under the weather, (which I am, can’t you hear me whining from here????) I want to make bread. There’s something about the softness of the flour, the warmth of the kitchen, the smell of baking…it’s so comforting. Even kneading helps! Of course, I’m spreading all my germs all over everything, but maybe the baking killed them. Who knows? Anyway, I also hooked up my Bose speakers (finally) to the stereo and I recommend kneading bread to “GusGus”.
I’m just sayin’….you should CHECK OUT THESE GUYS!

I haven’t made my Focaccia in a while – I used to make it every week when all the kids were home. The little savages would eat all of it in about an hour. It’s extremely easy and like all bread recipes, lets you attend to other important things while the dough is rising or resting. I mean, I did, like, 10 Sudoku puzzles!

Additions to the dough are up to you. I almost always add sautéed garlic and chopped chives. The toppings - you can go crazy….since there are 4 breads to a batch, you can do something a little different on each one. Today one had rosemary and sea salt, one had sliced tomatoes and finely grated Pecorino Romano, one had just the cheese, and one had thinly sliced shallots. Be sure to use a fruity olive oil for the brushing…makes a big difference. And I always sprinkle my breads with sea salt after baking. But I’m a salt freak. If I could have a salt lick in my living room, I would. Moo.

Focaccia

Makes 4 flat rounds

1 tablespoon dry yeast
4 cups warm water (we’re talking baby bottle warm)
3 tablespoons olive oil
About 6 cups bread flour OR 2 cups whole wheat flour and 3 cups bread flour
1 ½ tablespoons coarse kosher salt
GOOD extra virgin olive oil for brushing Focaccia

1. Fill a large mixing bowl with hot water. Let stand for a few minutes, then pour off water. Add the 4 cups warm water to bowl. Sprinkle the yeast over the water and let stand for 5 minutes.
2. Stir in the olive oil
3. Add half (3 cups ) of the flour and stir until it is all incorporated. Add salt and any additions you wish (see notes below).
4. Beat the batter (at this point, it’s like a thick pancake batter) until dough is elastic and grabs the spoon when you lift it. Stir in more flour to make a soft dough and mix until mixing becomes difficult.
5. Cover bowl with damp towel or plastic wrap and place in warm spot – let rise until doubled.
6. Sprinkle dough with handful of flour, enough to remove the stickiness on the surface.
Punch down dough, deflating it. Pour dough out of bowl onto a well floured surface. It will be pretty sticky, so cover your hands with flour and use a light tough. Cut (I use a dough scraper to do this) into 4 pieces. Knead each piece until dough is homogenous, adding more flour as necessary to keep surface dry and not so sticky. Maintain a soft dough and avoid the temptation to add more flour. Dust each piece lightly with flour, and set aside for about 15 minutes, to allow the dough to relax.
7. Preheat your oven now, to 400 degrees. Prepare 2 baking sheets by generously oiling them with olive oil. When ready, place 2 pieces of dough onto each baking sheet, pat and gently stretch each piece of dough into a disk, about 1 inch thick. Brush generously with olive oil. Let rise until puffy, 15-30 minutes.
8. If you have chosen to do so, sprinkle dough with toppings. Then dimple the dough with your fingertips. Brush tops with olive oil again. Bake in preheated oven for 20-25 minutes, until browned (check the bottoms too!) If baking both sheets in same oven, switch positions halfway through baking.


9. After breads are removed from oven, brush once again with olive oil and sprinkle with coarse sea salt, if desired.

*If you are adding garlic or onion into the dough, sauté first in the olive oil, let cool, then add when oil is to be stirred in. Other additions could be finely minced fresh rosemary or sage, freshly grated Parmesan or Pecorino Romano cheese, or pieces of dried tomato in oil.
* For toppings, sprinkle dough before you bake with one or more of the following…very thinly sliced onions or shallots, crumbed sage or rosemary leaves, finely minced garlic, Parmesan cheese, freshly ground black pepper, sea salt, thinly sliced, seeded tomatoes.


The picture below is one I took of a huge hawk sitting on my tree, outside my upstairs bedroom window yesterday. He was bedraggled and wet from the storm. I went outside to talk to him, but he didn't have much to say. He was pretty miserable, I think. So I got him a hot dog and put it below the tree. I think he liked it. Isn't he beautiful??


January 27, 2008

"Love, Honor, and WHAT!?!?

The Scene: A dark and rainy day. A man. A woman. Standing in the kitchen. The man is restless, talking, hungry. The woman is listening with her usual good cheer and patience. She is sniffling, hair in a deranged ponytail, and in her robe, because she has been fighting a cold for a couple of days. But she gazes with adoration at the man.

He: “So, when you are going to make that beef stuff again???”

She: (with a light background of harp music and chirping birds) “Why, darling, whatever do you mean?”

He: “You know! That stew that woman, uh, what’s-her-name, makes? Bare Feet Princess? Whatever food show you watch all the time – the really good meat stew! Come on, that stuff is good! I’m really hungry!”

She: (cute little clouds of happiness and rainbows surrounding her angelic face) “Why sweetheart, I think who you mean is, “The Barefoot Contessa” and you probably are remembering the "Beef Bourguignon"! I’ve made that a number of times and you loved it!”

He: “Yeah. Whatever. Make that.”

She: (tiny feathers of angel wings sprouting from her shoulders) “Why, my pumpkin, I would be so honored to prepare that for you! Shall I get you a beer and rub your feet before I begin? And then, while you’re napping on the couch with a bag of Fritos on your stomach, I’ll start a load of laundry and then I’ll run to the supermarket in this pouring rain to get all the ingredients and I will also get you some hunting magazines, 12 Snicker bars, and some Slim Jims – is that ok, my peach popsicle??”

Background noise of flying wooden spoon hitting a soft surface and then....a yowl.

Fade to the man and woman walking into Olive Garden, mid-afternoon. Man is looking a bit....under the weather. He is holding umbrella over the woman’s head and mumbling.
The woman glances up and smiles ever so sweetly. He holds the door open for her. They disappear into the restaurant. (Hallelujah chorus in the background.)


For all you kitchen saints out there, I offer this insanely delicious Beef Bourguignon recipe from Ina Garten. (from the book below) This is such a pleasure to make and serve…it really deserves a…very appreciative audience. If you get my drift.

Ina would never put up with any husband nonsense, I just know it. She’d just go out to dinner with one of her decorator pals.

“Beef Bourguignon – Ina Garten (The Barefoot Contessa)”

Serves 6

1 tablespoon good olive oil
8 ounces dry cured center cut applewood smoked bacon, diced
2 ½ pounds chuck beef, cut into 1-inch cubes
Kosher salt
Freshly ground black pepper
1 pound carrots, sliced diagonally into 10inch chunks
2 yellow onions, sliced
2 teaspoons chopped garlic (2 cloves)
½ cup Cognac
1 bottle good dry red wine such as Cote du Rhone or Pinot Noir
2 cups beef broth
1 tablespoon tomato paste
1 teaspoon fresh thyme leaves
4 tablespoons unsalted butter at room temperature, divided
3 tablespoons all-purpose flour
1 pound frozen whole onions
1 pound fresh mushrooms, stems discarded, caps thickly sliced.

For serving:
Country bread or Sour Dough bread toasted or grilled and rubbed with garlic clove.
½ cup chopped fresh parsley

Preheat oven to 250 degrees.

Heat the olive oil in a large Dutch oven. Add the bacon and cook over medium heat for 10 minutes, stirring occasionally, until the bacon is lightly browned. Remove the bacon with a slotted spoon to a large plate.

Dry the beef cubes with paper towels and then sprinkle them with salt and pepper. In batches in single layers, sear the beef in the hot oil for 3 to 5 minutes, turning to brown on all sides. Remove the seared cubes to the plate with the bacon, and continue searing until all the beef is browned. Set aside.

Toss the carrots, and onions, 1 tablespoon of salt and 2 teaspoons of pepper in the fat in the pan, and cook for 10 – 15 minutes, stirring occasionally, just until the onions are lightly browned. Add the garlic and cook for 1 more minutes. Add the Cognac, stand back, and ignite with a match to burn off the alcohol. Put the meat and bacon back into the pot with the juices. Add the bottle of wine plus enough beef broth to almost cover the meat. Add the tomato paste and thyme. Bring to a simmer, cover the pot with a tight fitting lid and place it in the oven for about 1 ¼ hours or until the meat and vegetables are very tender when pierced with a fork.

Combine 2 tablespoons of butter and the flour with a fork, and stir into the stew. Add the frozen onions. Saute the mushrooms in 2 tablespoons of butter for 10 minutes until lightly browned and then add to the stew. Bring the stew to a boil on top of the stove, then lower the heat and simmer for 15 minutes. Season to taste.

To serve, toast the bread in the toaster or oven. Rub each slice on 1 side with a cut clove of garlic. For each serving, spoon the stew over a slice of garlic bread, and sprinkle with parsley.

If I feel better tomorrow,

I'm making this. I may share.


January 24, 2008

"Leek and Cilantro Pesto Tart"


One of my very favorite books I have discovered this year is “At Mesa’s Edge” by Eugenia Bone. It is part cookbook, part memoir, but mostly a wise, witty, and warm look at how one very talented cook connects to a new land and way of life she had no idea she would fall in love with. Before she came West, Eugenia lived in NYC, writing and cooking for Gourmet, Food and Wine, Saveur, and other high-falutin’ publications. The last thing she dreamed she would be doing was chasing cows out of her garden, fly-fishing, and picking wild mushrooms.

Her husband fell in love with and bought a small ranch in western Colorado and before she knew it she was renovating an old ranch house, wrestlin’ skunks, and trying to figure out how to live “out west”. It’s a very enjoyable read, particularly because she is willing and able to change her perceptions and adapt to the regional way of raising food, hunting game, and getting along with the neighbors, some of whom are prickly characters. The recipes are wonderful. Today I made Eugenia’s very delicious “Leek and Cilantro Pesto Tart”. Get this book. Cook these recipes. You will be a better cook for it. It made me more determined to find my own place where I can fish in the morning, pick peppers from my garden in the afternoon, then sit on a porch and ponder the mountains in the evening. I’m working on it. My husband and I are searching for a small ranch ourselves.


In the meanwhile, I’ll just be jealous of Engenia and her tart.

“Leek and Cilantro Pesto Tart” by Eugenia Bone (from the book, “On Mesa’s Edge”)

4 large leeks (I needed to use 5) washed well and sliced into thin rounds (6 cups)
5 tablespoons unsalted butter
1 large egg
1 cup all-purpose flour
½ - 1 teaspoon cold water, as needed
3 large egg yolks
1 cup heavy cream
Salt and freshly ground black pepper
1 cup fresh cilantro leaves
¼ cup pine nuts
¼ cup olive oil
1 (I used 3!) large garlic clove, peeled

Preheat oven to 350. Butter a 9 inch tart pan. (I used a rectangular tart pan – I love that shape!)

Heat 1 tablespoon of the butter in a large nonstick skillet over medium heat. Add the leeks and cook until they are soft, about 15 minutes, stirring frequently to be sure they do not burn.

To make the pastry, cut the remaining 4 tablespoons butter into pieces and place in a food processor with the egg and flour. Pulse to blend until the dough forms a ball, or a lot of tiny soft balls, about 1 minute.. Add the water if the dough is not coming together. Wrap the dough in wax paper (I used plastic wrap) and refrigerate it for about 30 minutes.

In a large bowl, whisk together the egg yolks and cream. Add the cooked leeks and salt and pepper to taste and combine.

In a food processor or blender, combine the cilantro, pine nuts, olive oil, and garlic until the mixture is a nubbly (What a great word!) puree. Add salt to taste.

On a lightly floured surface, roll out the dough (I let mine warm up a bit before rolling) by pressing in the center of the ball with your rolling pin and slowly pressing outward in all directions. (Or the shape to fit your tart pan – mine was long and narrow) Place the dough into the pan, and press gently to fit. Pour in the leek mixture. Spread the cilantro pesto over the top as best you can (it doesn’t have to cover the entire top).

Place the tart on a baking sheet and bake for 30 minutes or until the top is just beginning to brown and looks puffy and a knife inserted in the middle comes out dry. Allow the tart to sit for 5 minutes before cutting and serving.


"A Day Late and a Pie Short"

Did you know that yesterday was NATIONAL PIE DAY????


And, being the goober I am, I FORGOT to bring my Dad a pie when I went to visit yesterday. There was hell to pay. To make amends, I took him out to lunch and bought him a ”Cinnamon Brandied Bread Pudding with Blackberries” at his favorite lunch restaurant, Crackers. It was a pretty awesome dessert. Even though it wasn't pie. On National Pie day. I should be flailed with a pastry brush.


AND he made sure I understood that next week, I was to bring a pie - an apricot pie. Apricots? In January? But he said he’d take “canned” apricots. Ok, anybody got any ideas for canned apricot pie? I am so pie-challenged.

This morning as I was dancing around singing Al Green and fantasizing that Randy Jackson called me, “dawg”, it occurred to me that I haven’t yet thanked Jenn "The Leftover Queen" for including me on the most awesome Foodie Blogroll! I mean, I could get lost for DAYS reading all the amazing blogs and being mesmerized by such talent. I have to put some sort of limit on myself, or I won’t get any pie makin’ done! But do check out the Foodie Blogroll, over on the right, down a bit….there are some seriously great cooks and writers sharing a wealth of knowledge and expertise. Thank you, Jenn!


January 22, 2008

A weird thing happened on my deer hunt in October.

Let me preface this story with some self-defense. I respect anybody’s distaste/dislike for hunting, but am mystified by those who eat slaughterhouse beef shot full of hormones then angrily judge my choice to shoot my own meat when possible.

Anyway, on this hunt I shot a very nice buck, but I’ve never seen one still in velvet that late in the season. Usually deer shed their velvet late summer, before the rut, and by the time hunting season rolls around, their antlers are completely devoid of any velvet. However, this buck was in full velvet, like it was still summer! We had never seen anything like that! At first, I thought “global warming – dang, if Al wasn’t right”! However, when I spoke to the taxidermist and asked if he knew what was going on, he had an interesting answer for me. Essentially, I shot a gay deer. His testicles never really…hmm…got busy, and he wasn’t at all interested in female deer. So his antlers never got the signal to shed, hence to rut and date the ladies.


I’m probably going to hear from GLAAD, aren’t I?

But meat is meat. I am a non-gender-biased cook! I have a freezer full of the best organic venison! Beautiful roasts, steaks, ground meat for all kinds of dishes, spicy jerky…the purest, healthiest protein available. The only thing better (to me) is fresh elk meat, but I didn’t fill my elk tag this year.


“Ol’ What’s His Name” has been hounding me to make a venison stew of some kind, something different than my usual chili. I love a potato soup, so I came up with this soupy stew. It’s definitely one of those stove-top concoctions that is best on a cold winter night, with warm biscuits and then baked apples for dessert. If you don’t have venison, ground beef would work just fine.

“Alternative Life-Style Venison Stew with Potatoes and Crispy Leeks”


6 large red potatoes, unpeeled, cut into bite-sized pieces
1 qt. beef stock (you may want to throw some salt in there, if the stock isn’t salty enough)
4 slices bacon, cut into ½ inch pieces
1 tablespoon olive oil
4 large leeks, washed well, trimmed and thinly sliced (white part only)
1 small box button mushrooms, sliced
1 pound ground venison (or ground beef)
1/2 teaspoon allspice
1/2 teaspoon rubbed sage
1 teaspoon salt (or more…venison needs salt!)
½ teaspoon freshly ground black pepper
1 cup whipping cream


1. Place cut potatoes and beef stock into large stock pot. Bring to boil then lower heat slightly and simmer until potatoes are fork tender, about 20 minutes.
2. Meanwhile, while potatoes are cooking, heat a large skillet over medium heat. Add bacon and sauté, stirring often, until bacon is crispy. Remove with slotted spoon to paper towels to drain.
3. Add olive oil to skillet and then add leeks. Sauté, stirring often until leeks are just turning brown and starting to crisp. Stir in the mushrooms and continue sautéing until mushrooms are just brown on edges. Remove leeks/mushrooms to plate, cover with foil to keep warm.
4. Add venison to skillet, crumbling with wooden spoon and sauté until meat is well-browned all over. Add the allspice and sage, stir. Add vegetables back into skillet, along with the crispy bacon, and stir to combine. Cook until potatoes are tender, and then add meat and vegetables to stockpot.
5. Bring soup to simmer, add salt and pepper and correct seasonings if necessary. Add cream and continue to cook until soup is back to simmer.
6. Ladle into bowls and serve immediately.


"Say, honey, gay deer isn't half bad!"

January 21, 2008


I don’t know if this is as much a recipe as an experiment that ended well.

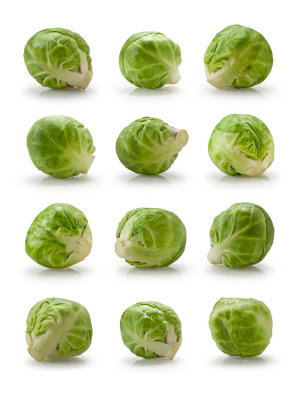
I was at a wedding shower yesterday and had too many truffles, cupcakes, hot cocoa (cute idea…several types of cocoa with an assortment of toppings which was nice, because the shower was outside and it was chilly) so once I got home I was in the mood for something savory and cheesy. My husband is on some sort of nutty health kick (which means he’ll be done with it in a couple of days as soon as I make a dessert he loves), so it was just my daughter and I. I had some nice baby Brussels sprouts, so I knew I wanted to use them. Added a carton of fresh spinach tortellini, a little Alfredo sauce (from a Bertolli jar) and some slivers of prosciutto (I need to talk to someone about my obsession with prosciutto). I LOVE roasted Brussels sprouts – to me, that’s only way to eat them. I wondered about the taste combinations, but, wow….the Brussels sprouts with the Alfredo sauce was GOOD. I think the slightly sulfuric taste of the sprouts mellowed by the creamy Alfredo sauce worked! Next time, I think I’d use plain pasta, like a penne, because I don’t like it when water collects in the little folds of tortellini – even with thorough draining, a little leaks out and spoils that cheesy bite.


My daughter really liked this, and she’s a tough critic. When I stand in the kitchen and say..."hmmmm, I wonder...", she usually takes off.

So sometimes, rummaging around the refrigerator pays off. It beats a bag of Cheetos!


"Roasted Baby Brussel Sprouts with Pasta and Alfredo Sauce"

About 2 cups of baby brussel sprouts
1 tablespoon olive oil
Salt and pepper to taste
1 small carton spinach tortellini
½ cup Alfredo Sauce (I like the Bertolli brand of jarred sauces very much)
A handful of prosciutto, slivered
A little finely grated Pecorino Romano

1. Preheat over to 400 degrees. Line a small roasting pan with foil. Trim and halve the brussel sprouts. Place in lined pan and drizzle with the olive oil. Salt and pepper to taste. Shake pan to coat with oil. Roast in preheated oven until sprouts are turning brown on edges, about 20 minutes. Remove from oven and set aside.
2. Meanwhile, bring a pot of water to a rolling boil. Add salt, then tortellini. Cook according to package directions, usually about 6 minutes. Drain well.
3. Microwave the Alfredo Sauce (covered…you know what happens if you don’t!) in a small bowl for 40 seconds. Stir, and repeat until hot.
4. Place drained tortellini on a plate and top with sprouts. Spoon sauce over the top. Pile slivers of proscuito on top and sprinkle with Peconrino Romano. Serve at once.

Serves 2.


January 19, 2008

"The Fix Everything Cake"


This is the “family birthday cake”, “fall down and scrap both knees cake”, “sorry my kid put bb’s through your window cake”, “I got a new pair of shoes cake”, and our family’s general all-around “make things a whole lot better cake”.

It’s a variation on the classic Italian Cream Cake, which is found in about a zillion cookbooks and websites. It’s pretty foolproof, delicious, easy to freeze, and wonderful to give as a gift. I hope you get a chance to bake and enjoy it. It might even get you out of trouble!

Coconut-Hazelnut Three Layer Cake

Serves: a lot of people

For Cake:
½ cup (1 stick) unsalted butter, room temperature
½ cup Crisco
2 cups granulated sugar
5 large eggs, seperated
2 teaspoons hazelnut syrup (the kind you use in coffee drinks)
2 cups cake flour
1 teaspoon baking soda
½ teaspoon salt
1 cup fresh buttermilk
2 cups flaked coconut
½ cup chopped hazelnuts

For Frosting:
½ cup (1 stick) unsalted butter, melted
1 8 oz package cream cheese
2 teaspoons hazelnut syrup
1 box powdered sugar
½ cup flaked coconut, lightly toasted*
¼ - ½ cup chopped hazelnuts, lightly toasted*

1. Preheat oven to 350 degrees. Prepare 3 round 8” cake pans by either using parchment paper or greasing lightly and flouring the pans.
2. In large mixing bowl, cream together the butter, Crisco, and sugar.
3. Beat in the egg yolks and hazelnut syrup.
4. In a medium mixing bowl, sift together the flour, baking soda, and salt.
5. Add the dry ingredients alternately with the fresh buttermilk to the sugar/butter/egg yolk mixture. Mix well.
6. Stir in the coconut and nuts.
7. In deep cold bowl, beat the egg whites until soft peaks form. Fold into cake batter carefully but completely.
8. Pour batter into prepared cake pans. Bake for approximately 30 minutes or until golden brown and springy in the middle of cakes.
9. Cool for 10 minutes in pan, and then remove cakes from pan to cool completely on racks.

To prepare frosting:
1. Place melted butter into medium size mixing bowl. Add the cream cheese and work into melted butter with a wooden spoon. After incorporating butter and cream cheese, switch to electric beater and add the hazelnut syrup and powdered sugar. Beat until glossy and smooth.

To assemble cake:
1. Place first layer, rounded side down, on cake platter or plate. Frost sides and top lightly. Repeat with second layer and third. Frost cake thickly up the sides and on top. Frosting will be soft and gloppy, giving the cake a definitely “rustic” finish! This ain’t fondant stuff! Top cake with the toasted coconut and hazelnuts, sprinkling some of the nuts around the bottom of cake.

* I toast the coconut and nuts (separately) in a large skillet over medium-low heat, shaking pan to keep browning even. Watch carefully, so they won’t burn! Remove from heat when exact browning color is achieved, and turn onto plate to cool.


I made this cake last night because our son is home for a short leave from his Marine base…he leaves for Iraq in a few weeks. I think he’ll probably eat this whole cake by himself.

I’m calling this one “my son is my hero cake, so that’s why I’m crying cake”.


Mac, with one of his littlest cousins, Megan

January 18, 2008

"Virtue on a Plate"


Umm…remember those brownies from yesterday? Well, they’ll gone. And I don’t think anybody else had any. Pitiful.

So in a guilty sugar haze, I put together my “Virtue on a Plate”…some baby greens, edamame, carrots, pine nuts (that’s good fat – so don’t look at me that way!), buffalo mozzarella (that's good fat too - good for shiny hair!) and some negative calorie Italian dressing. So, there I sat, eating my salad, looking like a nun during Lent. Of course, the chocolate smears up and down my shirt didn’t add to the picture of virtue, but I tried.

Speaking of salads, I am reading the most fascinating, terrific book on the history of “foodie-ism” in America. “The United States of Arugula – The Sun-Dried, Cold-Pressed, Dark-Roasted, Extra Virgin Story of the American Food Revolution” by David Kamp.


I recommend this excellent book if you are interested in the personalities, politics, and processes behind our schizophrenic food culture. The book is not only educational, but very entertaining (although there are a few things I’d rather NOT know about Craig Clairborne).

What I found most interesting (so far, I’m only about half way through) is the chapter about Chez Panisse, the legendary restaurant in Berkeley. And how Alice Waters and her crew completely altered the course of how restaurants are conceived and run. It’s a riotous, almost unbelievably story of how they pulled it off. And how the restaurant continues to be such a huge influence in the food world. It's kinda magical.

I’m currently on the chapter about the Northern California revolution toward sustainability, growing and eating locally, and how it dramatically changed our notions about eating. The chapter on Bill Ninam and his evolution toward organically grown beef will change your ideas forever about what constitutes a good steak.

Great book. I think I need to get a goat, some French beet seeds and an olive press.

And some organic, free-trade chocolate for brownies.

January 17, 2008

"Jacques to the Rescue!"


Sometimes a girl needs some help. I mean, when I’m in the mood to seriously cook, oh, you know, something ridiculous like Bourdain’s “Carre’ d’Agneau Au Moutarde” (ok, maybe not today…the stars aren’t aligned quite right), I really am not in the mood to wrestle with anxiety provoking towers of sweetness.

Hence – the fabulous shortcut! Jacques Torres knows a thing or two about chocolate and his brownie mix is…awesome. And fast. And super easy. I order boxes from King Arthur’s Bakery website. The box is cute too. The kit comes with the brownie mix and huge pieces of chocolate to incorporate into the batter and also for making the killer glaze. All you need is two eggs, some heavy cream, vanilla, and espresso powder if you wish, for the glaze. It is the best store-bought mix, brownie or otherwise, I’ve discovered. I like to cut the brownies warm and then slather on the glaze, rather than frosting in the pan and letting set up. I also serve these with a shot of milk, which will complete the whole “wow, rack of lamb, then this???” vibe.


King Arthur’s has a great website, full of necessary (and frivolous) baking accessories. One cannot have enough Silpat! The price is obviously much higher than your grocery store brownie mix, but when you are concentrating on a complicated dinner, and whining at your kids to stay out of the kitchen, and yelling at your husband to get his fingers out of the sauce, it’s very reassuring to take one bowl, one spoon, one pan, and create calm, predictable deliciousness out of kitchen chaos.


Not everything from scratch, my peeps! Go play Twister with the guests! Then whip out these dark little temptresses and…well, take claim. Jacques would probably forgive you!

January 16, 2008

"The Papa Dale Pie Project"


My Dad inherited an extra 4 kids when he married our Mom. Our “real” Dad was killed in an airplane crash, and my Mom had the good sense to marry Dale C. Riggins, Jr., AKA, “Papa”. We also got two groovy brothers out of the deal, even though one of them licks my face to this day and thinks it’s funny! Papa became my loving and very patient guiding light over these many years of various mishaps, hilarious hi-jinx, and other assorted activities that would have driven a lesser man to drink. But, you see, they just don’t make men like my Papa anymore. He has a high set of standards that he holds himself to, but never judges others for failing them. He treats all, but especially my Mom and his kids, with great respect, loyalty, and has led and advised us with common sense and humble intelligence. I have never heard him gossip about others. He worked hard all his life, but still was up for whatever adventure one of us would drag him into. He would embarrass me to death when I was 17, when on a family vacation to Southern California, he walked down to the beach (the one with all the cool surfer dudes I was trying to impress with a lot of hair flinging) in his Bermuda shorts and cowboy boots. Then turn around and bail me out of whatever nonsense I had gotten into.


His hero is John Wayne and he loves pie, my Mom, bass fishing, and hunting. He is 81 years old and still could out-walk me, out-shoot me, and pretty much out-wit me any ol' day of the week. I'm crazy about him.

Which leads to my new “project”….the “Papa Dale Pie Project”. My Mom is in the later stages of Alzheimer’s and I go to visit them every week (they live some 2 hours south of me). Because my Mom can no longer make pies, and my Dad misses them terribly, I’ve taken on the task of trying to make pies that will meet his exacting standards. Now these standards were in place at a very young age for him, because his Mother was a test cook for Betty Crocker and various other “test” kitchens. So, just any ol’ pie won’t do! There are various things that must occur! For instance, in apple pie, you must use Golden Delicious, not Granny Smith…(a mistake I made, that I will not make again, for sure!). And you can’t mess around with a pie too much. No “gourmet crap” or “weird stuff”. So it has become a little enjoyable test for me each week – making a pie that makes my Dad happy. At the end of each visit, he gives me my “assignment” for the next week. Last week was Coconut Cream Pie. It was “pretty good”. Sigh. Today is Blackberry Pie. It is a very basic pie, relying on deft pastry skill, and the freshest ingredients….which of course, I have neither of those, so I used a basic pie crust recipe and frozen (thawed overnight and drained) blackberries, because I could find any respectable fresh ones. Because I cannot travel down today, my husband (ol’ “what’s-his-name”) will deliver it later this morning for me. I’ll wait until this evening, then I’ll call for the verdict. I hope it’s better than “pretty good” – because my Papa is definitely more than “pretty good”.

Blackberry Pie

4 cups fresh blackberries (or frozen – thawed and drained)
½ - 1 cup granulated sugar (strictly a matter of taste and how sweet you like your pies!)
½ cup all-purpose flour (now, I think I might throw a little tapioca flour in there next time)
1 recipe pastry for double-crusted 9 inch pie
3 tablespoons butter, cut into pieces
Some milk for brushing top
¼ sugar


1. Preheat oven to 425.
2. Place the berries into a large bowl. In another smaller bowl, whisk together the sugar and flour. Combine with the berries – blend well, gently as to not break up berries.
3. Pour berries into pastry shell and cover with top crust. Crimp edges, and vent with sharp knife. Brush the top crust with the milk and sprinkle the ¼ cup sugar over top.
4. Bake in preheated over for 15 minutes. Reduce heat to 375 and bake until done. I leave the time completely open, depending on ovens, but in my oven, it takes about 35-40 minutes longer to get that glorious brown crust! I also “tent” the edges of the crust if they brown too quickly…I use the quick-release foil, because I’ve had “issues” with foil sticking to the edges!


January 15, 2008

Crock-Pot Carne Adovada...Stuff


I recently was lucky enough to have won the "What's For Dinner?" category of the Williams Great American Chili Contest. What a surprise and a thrill...a surprise, because this recipe is SO VERY EASY (a blind monkey could do this) and a thrill, well, because I'm a very excitable kinda nut! My Mom made a version of this for years, and it was a favorite of mine growing up. My Mom loved her crock-pot and while I don't use it as much as she did, I definitely put mine to good and easy use. I especially like the new crock-pot liners - they REALLY make clean-up super fast. You can throw this together early in the afternoon (seriously, one reason I don't use my crock-pot as much as I'd like to, is some recipes call for much longer cooking times, which puts start time early in the morning - come on, I can barely get my slippers on and the Cheerios in my bowl!) and the wonderful spicy aroma is filling the kitchen by dinnertime. Enjoy! (I found the seasoning at Wal-Mart...and, yeah, I shop at Wal-mart often...the prices CANNOT be beat! )


2 pounds lean ground beef, browned and drained

1 can (14.5 ounces) diced tomatoes

1/3 cup chopped onion

1 can (4.5 ounces) chopped green chilies

2 cloves garlic, minced

1 package Williams Tradiciones Carne Adovada Seasoning

1 teaspoon salt

¼ teaspoon pepper

12 corn tortillas

2 cups shredded Cheddar cheese

Sour cream, chopped cilantro and/or salsa, for topping, optional


Mix together browned ground beef, tomatoes, onion, green chilies, garlic, Williams Tradiciones Carne Adovada Seasoning, salt and pepper in a large mixing bowl. Place ½ cup meat mixture in a 4-quart slow cooker, then spread to cover bottom of cooker. Place 1 whole tortilla over meat then top with ¼ cup cheese. Repeat layers using 8 tortillas. (Reserve 3 tortillas and some meat and cheese for top layer.)Tear remaining 3 tortillas in half and tuck along the sides of the slow cooker. Cover top with remaining meat and cheese, being sure to completely cover all tortillas. Cover and cook on low setting 4 to 6 hours or high setting 3 hours or until completely hot through. Garnish top with sour cream, cilantro, and salsa as desired. Makes 6 to 8 servings.

January 13, 2008

"All Hyped Up and Nowhere to Go"


I went to Cost Plus a few days ago and bought some Guittard Cappuccino Chips, not really knowing what I’d do with them, but they were on sale, so I got them along with some anchovy-stuffed olives, curry flavored potato chips, and a dust mop. Hey, do I know how to shop or what??? Cost Plus is the most RANDOM store! Lots of great stuff - where else can you buy a coconut monkey and wine glasses at the same time?

Last Thursday night I watched “30 Rock” (Thursday night is MY television night…first there’s “My Name is Earl”, then “30 Rock”, then “Scrubs”, all big favorites of mine), and it was an hilarious episode because “Kenneth the Page” had a cappuccino machine installed at his desk and he began drinking cappuccinos non-stop with predictable results…completely buzzed out, freaky, and well, I was laughing so hard, I had to change the channel briefly so I could catch my breath!


Cappuccino inspiration by Kenneth!!!


These cookies are awesome…not too sweet, very grown-up, and not recommended for coffee dunking…probably safer with milk! You don’t want to end up like Kenneth!


"Cappuccino Chip Cookies with Chocolate Espresso Frosting" –
{Subtitled, "Kenneth the Page Goes Nuts" Cookies}

Makes 36-40 cookies

Cookies:
1 cup (2 sticks) butter, softened at room temperature
¾ cup dark brown sugar
¾ cup granulated sugar
2 eggs
1 teaspoon vanilla
2 ¼ cup all purpose flour
1 teaspoon baking soda
½ teaspoon salt
1 pkg. (12 oz) Guittard Cappuccino Chips

Frosting:
1 ½ cups semi-sweet chocolate chips
4 teaspoons shortening
3 teaspoons instant espresso powder
About 2 teaspoons hot water

1. Preheat oven to 375 degrees and line baking sheet with parchment paper.
2. In a large mixing bowl, beat together the softened butter, and both sugars. Add eggs, beating well after each egg. Stir in vanilla.
3. In another smaller mixing bowl, place the flour, soda, and salt and stir with fork to incorporate together.
4. Add flour mixture to butter/sugar/egg mixture in 2 or 3 additions, blending well.
Add the cappuccino chips and stir until well blended.
5. Bake in preheated oven until golden brown, about 8 minutes. Remove from oven, let cool slightly on baking sheet, then transfer cookies to rack to cool completely before frosting.

For Frosting:
1. In medium sized microwaveable bowl, place chocolate chips and shortening. Microwave for 10 seconds, stir, then repeat process until mixture is melted and creamy.
2. To a small bowl, add the espresso powder and hot water and stir until it’s a nice thick, syrupy consistency. Add to melted chocolate chips and stir well. Microwave for a few seconds if needed.
3. Using your favorite method (mine is a butter knife), frost the cookies with the warm frosting….it will “set up” in a few minutes.


January 12, 2008

"Wild Burros, Chicken Livers, and Broccoli Soup"


Ol' "What's-his-name" and I have been wanting to have a fun over-night trip for just the two of us since before the holidays. Schedules have been hectic, so rather than schedule yet another thing to do, we agreed that one morning we'll just wake up and do it! Something totally spontaneous! We tried many times, but it was always, "oh, I have this", or "oh, I can't get out of work", or something. So finally, yesterday, all the planets aligned, and it was that day! We knew we didn't want some elaborate trip that required a plane, too much driving, or clothes that needed to be dry-cleaned. We wanted to wear jeans, sweatshirts, take at least one good hike, and not make any reservations. Just wing it!
Seemed a little daunting, until we pulled out our trusty (and crusty) Arizona road map. We decided to go south, out of the snow and cold. But we didn't want to go near Phoenix, because we go down there all the time. So we found a road, neither one of us have been on...the Castle Hot Springs Road, northwest of Phoenix. It takes you through a remarkably beautiful desert canyon, and drives by the famous (but closed) Castle Hot Springs Resort. There was water running in the creeks (such a rarity!) and the temperture was perfect. We came upon three little wild burros, just hanging out in a wash. Wild burros are indigenous to this part of the southwest, and it's hard to find them...they are elusive little guys. They wouldn't let me get any closer than the above picture, but we spent several minutes all staring at one another. Further down the road, we took a long hike down a canyon, hopping over boulders and waterholes....just one of those perfect days that just happens out of no planning and no expectations.

We end up in Wickenburg...a fun western town west of Phoenix....and got a very reasonable room at a 61 year old Best Western. It was dated for sure, but comfortable and right in the middle of town. We had a great Mexican food dinner at a restaurant we walked to and slept like little burros tucked into our bed, tuckered out from the hike. In the morning, we tried out the very small, and very good local breakfast cafe recommended by our waitress from the night before...and "what's-his-name" had a chicken liver omelet that was really really good! I was not down with the whole idea of liver and eggs, but it was delicious. I, of course, had the truck driver's special...sausages, eggs, biscuits and gravy...I think my arteries seized up right there and then. I LOVE local diners. Especially ones that have old pictures of Roy Rogers on the wall, and waitresses named "Dot".


We drove on home and feeling still stuffed with chicken livers and about 5 pounds of gravy, I decided to make a healthy and light soup out of whatever I would find in the refrigerator...which was green onions, broccoli, and a few mushrooms. And an almost expired bottle of heavy cream (well, there goes the healthy soup idea!)...what I came up with was surprising...like finding a charming little burro in the middle of nowhere! I loved this soup! I couldn't wait to write it down and post it. The amounts might be off, but just adjust to what looks right to you. I didn't take a pic, didn't think it would be .jpg worthy! But, it's dang good!


Cream of Broccoli and Green Onion Soup with Pan Roasted Mushrooms

Serves 2, very generously

1 tablespoon butter
1 tablespoon olive oil
1 ½ cup sliced mushrooms (more or less)
3 cups of chopped broccoli (florets and peel stem)
3 cups of chicken stock (and add water to cover broccoli, if necessary)
3 green onions, chopped
1 cup heavy cream
1 tablespoon brandy
1 teaspoon fresh thyme leaves
Salt and pepper to taste

1. Heat a medium skillet over medium heat. Add the butter and olive oil and swirl pan to coat. Add mushrooms and sauté, turning once, until mushrooms are golden brown. Remove from heat.
2. Place the broccoli and chicken stock (and water if necessary) into medium-sized, heavy saucepan. Bring to boil, lower heat to simmer and cook broccoli until fork tender, about 8 minutes.
3. Using an immersion blender, or using conventional blender, add broccoli and liquid, 2/3’s of the chopped onions, and puree until smooth. Return to saucepan.
4. Place saucepan over medium heat and bring back to simmer. Add cream and brandy. Simmer for 5-7 minutes, stirring occasionally. Add mushrooms and thyme and stir. Taste and add salt and pepper as desired.
5. Ladle into deep bowls and garnish with remaining green onions.
Unplanned surprises....the very best!

January 11, 2008

"Mother's Who Think"


A few years ago, gosh, it might be as long as 8 years ago, I wrote an essay for Salon, an online magazine. I was pretty dang surprised to hear they were going to include it in a print collection of essays called, “Mother’s Who Think”. Um, right there, that title made me doubt their choice, since the essay wasn’t the epitome of “thinking”. It was entitled “How I Beat a Bull with my Three-Speed Blender”…a short “lively” true story about a rogue bull that wandered into my yard and threatened my boys.

I was just thrilled to be included in a collection of such an amazing caliber of writers, especially Anne Lamott, one of my favorite, “mothers who think”. And, the book hit the NYT best-sellers list for, oh, about 10 minutes. Woo Hoo!!!

So, because it involved a blender, (so it's kinda about food), and because I’m bashfully proud of it, I’m gonna post it here. It’s such a old book, you might find it in the library…or pick it up at Amazon for something like 54 cents! Some of the essays are too liberal for my tastes, but some are so deeply moving and truly spoken, that they will resonate with any Mom...or any woman or man, for that matter. I believe we all have maternal instincts, even the most die-hard, cigar chomping truck mechanic. He probably loves kittens.
These essays speak (except for mine, which is silly and not very deep!) about those feelings and how we deal or manifest them in our lives. Being a Mom (or a Dad, or a devoted Aunt, Uncle, or Grandparent) is scary business, deeply rewarding, often frustrating, and ultimately the biggest self-sacrifice we will ever make. It's good, I think, when we get to read someone else's ideas about these issues - for me, it's like, "oh, I'm not the ONLY one who feels that way"!


So read the book for THOSE essays, especially Anne Lamott's.


BTW...I STILL have that blender!

January 10, 2008

Traitor!!!!


So…my husband (whom I’ll call “what’s-his-name”) has been bugging me to make Beef Stroganoff. I’ve never been a fan of this particular dish since my Mom’s version, normally a great cook, was a horrendous mess of canned soup, hamburger, and low-fat sour cream that made me gag. So I’ve never made it. But “what’s-his-name” has an affinity for meat and gravy type dishes, so I relented. After looking through my cookbooks and websites, I found a recipe that sounded terrific – it had cream cheese as an ingredient! And it had great reviews! How could I go wrong? And in a crock-pot! Perfect!

Here’s what happened:

Me: “So, do you like it?”

"What’s-His-Name": (after a long silence) “This tastes like crap”

After that eloquently put food review, I threw the whole mess out for the coyotes to eat.

Hamburger helper for you, “what’s-your-name”!!!!! And get crackin’ on those dishes!

January 8, 2008

Contesting


Disclaimer - I am totally an amateur cook. But I really love entering cooking and recipe contests – it’s been something I have been doing a little less than a year. I won my first one with a Better Homes and Garden contest, and immediately went bonkers. I think my fervor for this “hobby” is a combo of figuring out what the sponsor is looking for, coming up with something unique and good enough to win, and the anticipation of waiting to see what will happen. And, of course, tearing up my pantry and kitchen and driving my family nuts is pretty enjoyable too. I’m the type of crazy person who loves getting ready for the trip more than going on it! I was the little girl who would get so excited waiting for Christmas that when the day finally came, I’d puke all over the place and fall asleep. The anticipation is DELICIOUS! That phone call! That certified letter! The cook-off with the television cameras! Yowsa…it’s so MUCH FUN!!!!

The prizes given in these contests are varied…some give really big cash (think of the $1,000,000 payout from the Pillsbury Bake-off!), and most are smaller cash prizes, appliances, trips, cookbooks, cooking lessons, and all manner of things. And I love it, (no, I mean this, I’m not being sappy) when someone I know wins too.
I have met some fantastic people (virtually and real) who love this as much as I do. Truly amazingly talented people with big hearts and big ideas. I mean, there are some people I know who would SCHOOL Rachel Ray! Not to take anything from RR…I mean, kudos to her for figuring out what works on TV, and working hard to make it a success. I even have lightened up my opinion of Sandra Lee. The girl has worked it. We may disguise our envy with disdain for their methods, but you gotta hand it to them. Anyway, I digress.

My point is that I wanted to share these thoughts about contesting. And that you poor readers will have to endure my ramblings about contests, losses and wins, and all manner of hand-wringing. I did just get notification that I won a nice contest yesterday, but I can't post what it is until I sign all the legal stuff…I mean, they might find out about that time in 1982, in Mexico…..um, involving a box of shrimp, a taxi, and tequila. Probably won’t disqualify me, but…..

Stay tuned!

January 4, 2008

"Everybody Loves Soup"


It’s going to snow tonight and tomorrow, so it’s time for my Kale, Kielbasa, and Cheese Tortellini Soup. When the weather looks cold and blustery, and I’m looking forward to nothing more strenuous than watching “Everybody Loves Raymond” re-runs, I know I’ll be pulling this soup together. I believe it’s the first soup (or anything for that matter) the kids actually ate with “green stuff” floating around. That was quite an achievement. Simple, hearty and ready to serve in about 30 minutes. Crusty sourdough bread and a glass of Seghesio 2005 Sangiovese, Alexander Valley. Time to watch Marie tell Deborah she can’t cook!

Kale, Kielbasa, and Cheese Tortellini Soup

Serves 4, with lots of leftovers for the next day, or 6 and it’ll be gone!

2 tablespoons olive oil
6 cloves of garlic, sliced thin
1 large onion, chopped
4 or 5 stalks of celery, with leaves, chopped
1 tablespoon fresh thyme leaves
A pinch of dried red pepper
Freshly ground black pepper
½ package (7oz) of Polish Beef Kielbasa, chopped
1 package (32 oz) chicken broth
1 bunch kale, leaves stripped from rib and roughly torn into pieces (about 6 cups)
1 package (9 oz) cheese tortellini
Freshly grated Parmesan cheese

1. In a large stockpot, heat the olive oil over medium high heat. Add the garlic, onion, celery, thyme, red pepper, black pepper to taste, and the Kielbasa. Sauté, stirring occasionally until vegetables are softened and sausage is beginning to brown.
2. Add the chicken broth and 4 cups of water. Bring to boil.
3. Add the kale and stir. Lower heat and let simmer for about 10-15 minutes.
4. Turn heat to boil, add the tortellini and cook for 4-5 minutes or until tortellini is tender
5. Ladle into deep, shallow bowls and sprinkle with the grated Parmesan cheese.


I LIKE Lileks!!!


If you haven’t had the opportunity to read James Lileks, you are in for an extraordinary treat. Possibly the funniest, wittiest writer on food and culture (well, Amy Sedaris is right up there, but she is not for the faint of heart, for sure!). His “Gallery of Regrettable Food” is a hoot! If you grew up eating "back of the box" recipes and being told children were starving in China, so you better eat that boiled broccoli, you'll like Lileks.
I urge you to bookmark his site and check his various and prolific writing, both on his site and elsewhere.

January 3, 2008

Chicken Therapy


Here’s a nifty recipe for those boring chicken fillets that just beg to be beaten. Pounding the living daylights out of a piece of chicken has saved my husband numerous times.

The recipe is (like most of mine) easy to tinker with, using what you have rather than what you have to go to the store for. Safeway at 4:30 pm? I think not. I imagine most of us have rolled up a chicken part over some kind of stuffing, but I thought I’d share one of our favorites. I’ve made notes on substitutions you may want to consider.

Florentine Chicken Roll Ups

Serves 4 (but easily doubled)

4 boneless, skinless chicken fillets
4-8 slices of good smoked ham or prosciutto (depending on what you like and how big and thick the slices are)
4 oz plain goat cheese
1 cup finely shredded spinach leaves
¼ teaspoon dried oregano
¼ teaspoon dried basil
¼ teaspoon black pepper
Salt and pepper to taste
About 2 tablespoons extra virgin olive oil

1. Preheat oven to 350 degrees.
1. Place a fillet between two plastic storage bags (I use quart sized Ziplocs) and pound them with a meat mallet until the fillets are about ¼ inch thick, being careful not to tear the meat. Repeat with all fillets, carefully peeling plastic from each fillet and reusing again. Place fillets on work surface to proceed.
2. Arrange slices of ham or prosciutto on top of each fillet to your liking.
3. In a small bowl, combine the goat cheese, oregano, basil, and pepper. Spread equally over the tops of the ham/prosciutto slices.
4. Starting with the widest end, roll each fillet up, like a crescent roll, and secure with a toothpick.
5. Line a baking sheet or pan with foil. Brush 1 tablespoon of the olive oil over the foil.
Arrange the chicken rolls on the sheet or pan and drizzle with the remaining oil. Salt and pepper the rolls. Bake for 30-40 minutes or until chicken is no longer pink in thickest part of biggest roll.

Notes: Once I used marscapone cheese instead of goat cheese. And one picky kid (you KNOW who you are...Evan) refused to eat goat cheese because it smelled like “gym socks”. So, I used a combo of mozzarella and cream cheese. Pretty good! And definitely use fresh herbs if you have them handy….I’d double the amount, if using fresh. And a very successful substitution for the spinach was arugula! This is lovely served with rice and a simple salad.
 
Creative Commons License
"The Dish" by Catherine Wilkinson is licensed under a Creative Commons Attribution 3.0 United States License.